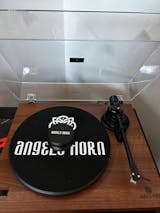
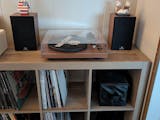
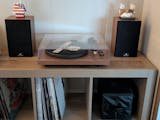
Angels Horn AH6 Setup Guide
Angels Horn AH6 Setup Guide
Please read before unpacking.
1. Unpack all items from accessory bag.
- Belt (inside the platter)
- Counterweight (in a hole of the Styrofoam)
- User Manual
- Belt Hook
- 45 RPM Adapter
- Cartridge Alignment Protector
- Audio Cables for Speakers
- Anti-skating Weight
- Power Cord

2. Remove the turntable and speakers from the box.

3. Lift the wrapped turntable and speakers out of the box.

4. Unpack the power supply and other accessories.

5. Unpack the platter.

6. Put the drive belt on the pulley.
Install the belt to the platter drive ring under the platter making sure the belt is flat when seated, and then attach the belt to the motor pulley.
Make sure that the belt does not get twisted.


7. Put the felt mat on the platter.

8. Install the counterweight.
- Gently push and turn the counterweight onto the rear of the tonearm (with the dial facing towards the front of the turntable).
- Position the counterweight between the tonearm rest and the cartridge.
- Lower the tonearm lift lever.
- Adjust the counterweight until the tonearm achieves a neutral balance.
- Raise the tonearm lift lever, return the tonearm to its rest, and lock it.

9. Balance the tonearm.
- Position the tonearm between the tonearm rest and platter, without moving the counterweight, gently rotate the tracking force dial to “0”, and check the tonearm is still balanced. If not, return the tonearm to its rest and lock it and proceed to the next step. If not... rebalance the tonearm.

- Hold the flat face of the counterweight and rotate it counterclockwise until you feel you made the second rotation and stop at “1.5”.

- Slip the loop of the anti-skating weight’s thread over the 3rd groove of the stick, tighten the loop, and then hang the thread on the hook of the support.

- The knot of this loop is a slip knot and is adjustable. The specific operation is to pinch the side of the short thread and gently pull the loop to adjust the size of the loop.

10. Installing the lid.

11. Connection to the Included Speakers.
Connect the speakers using the included audio cable (black cable to black cable clamp and red cable to red cable clamp).

12. Insert the DC plug of the AC adapter cord into the DC input jack.

13. Then you can enjoy your vinyls!

Cautions
- When peeling off the sticker on the stylus or applying a downward force may cause the stylus to come off the body. Only low volume will be produced if the stylus comes off.
- Only move the tonearm toward the tonearm rest. Move it at a slower speed and keep it in the lock position.
- If adjusting the anti-skating adjustment dial (located on the rear of the platter) is required, turn it slowly.
- The Turntable is Wi-Fi certified, which allows it to communicate with other Wi-Fi compatible devices, like nearby Bluetooth speakers or headphones.
- If the stylus and vinyl become loose during transportation, if there is no sound or the sound may not be heard the record stylus has been damaged.
- The input terminals of the turntable are for connecting external audio devices like MP3 players, CD players, etc., so you can listen to your music through the built-in speakers. Please refer to the instruction manual for details.
- Important: for warranty, do not throw packaging away.


